Installation Steps
Before proceeding, ensure you meet the Prerequisites.
Note: ABAP FS registers 40+ AI tools for Copilot, but only the documentation tool is available until you connect to a SAP system. Connect to SAP first to unlock all tools.
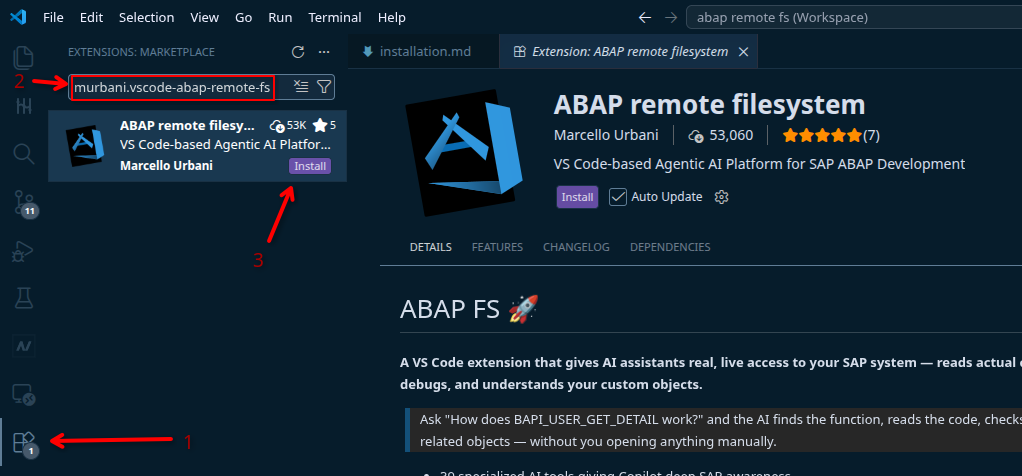
1. Install the extension
- Press
Ctrl+Shift+Xor Click on the extension icon on the activity bar to open the Extensions panel (left sidebar) - Search for murbani.vscode-abap-remote-fs or ABAP remote filesystem
- Click Install, then restart VS Code
2. Configure a SAP system connection
- Press
Ctrl+Shift+Pto open the Command Palette (the search bar for VS Code commands) - Type and run: ABAP FS: Connection Manager
- In the connection manager window, click Add SAP System and fill in:
- URL – your SAP system URL
- Client, Username, Language
- SAP GUI settings (optional)
- Choose where to save the connection:
- User settings – available in all your VS Code workspaces
- Workspace settings – stored in the current project folder only
Tips:
- Passwords are stored in the OS credential manager, not in settings files.
- If a colleague already has connections configured, ask them to export via Import/Export and send you the JSON. User IDs and passwords are excluded from exports. You can then import and update your credentials in bulk using Bulk Operations.
- For SAP BTP systems, use Cloud Support to create a connection from a BTP Service Key or Endpoint.
3. Connect to a SAP system
- Press
Ctrl+Shift+Pand run: ABAP FS: Connect to an SAP system - Select the system you configured
- Enter your password if prompted
- Wait a moment for VS Code to establish the connection
Password Management
- Change password:
Ctrl+Shift+P→ ABAP FS: Change Connection Password — select a system and enter your new password. - Forget password:
Ctrl+Shift+P→ ABAP FS: Forget connection password — removes the stored password so you're prompted again on next connect.
4. Verify the connection
- Look for the ABAP FS icon in the Activity Bar (the vertical icon strip on the far left)
- Expand the views: Transports, Dumps, ATC Finds, Traces, abapGit
- Test object search:
Ctrl+Shift+P→ ABAP FS: Search for object
Updates
The extension updates automatically if installed from the VS Code Marketplace and auto-update is enabled. To check: open the Extensions panel (Ctrl+Shift+X), find the extension, and verify Auto Update is on.